
Quartz Countertops Temecula, CA

Plain notes on quartz countertop installation in Temecula, CA: choosing a slab for hot kitchens, templating, seam placement and judging the finished work.

What We Cover

Quartz Countertops Temecula, CA

A quartz countertop in Temecula, CA starts long before the slab arrives. It starts with a kitchen where the cabinets are set and level, the sink is on site and the template can be taken against real walls. Most of the problems that show up later, a seam in the wrong place or an overhang that flexes, trace back to a decision skipped at that first visit.

Quartz and natural stone in a hot valley

The summers in Riverside County are long and dry, and a slab beside a west facing window takes the full afternoon sun. Quartz is crushed stone held together with resin, and the resin is what dislikes heat. Granite and quartzite do not have that weakness, so the choice between them is often made at the window, with a sample left in the light for an hour.

From template to install day

The fabrication shop cuts the slab from a digital template, so accuracy depends on the measuring. Seam placement, edge profile, sink cutout and overhang support are all settled before cutting begins. In older homes near Murrieta Creek and the Santa Margarita River, walls and cabinets are rarely straight, and the installer shims, scribes and supports to suit.

Kitchens across the valley

Temecula kitchens range from small galley layouts to large islands built for entertaining after a day in the wine country. Each asks different things of a surface: heat tolerance beside the range, wipe-clean upkeep, and enough thickness over a long span. Some homes sit toward the Santa Rosa Plateau, where larger lots mean larger kitchens and longer runs that need a seam.

Guides

The pages here cover choosing between quartz and natural stone, what happens at the template visit, quartz near sunny windows, preparing an older home, where seams go, and how to judge finished work.

Latest Guides

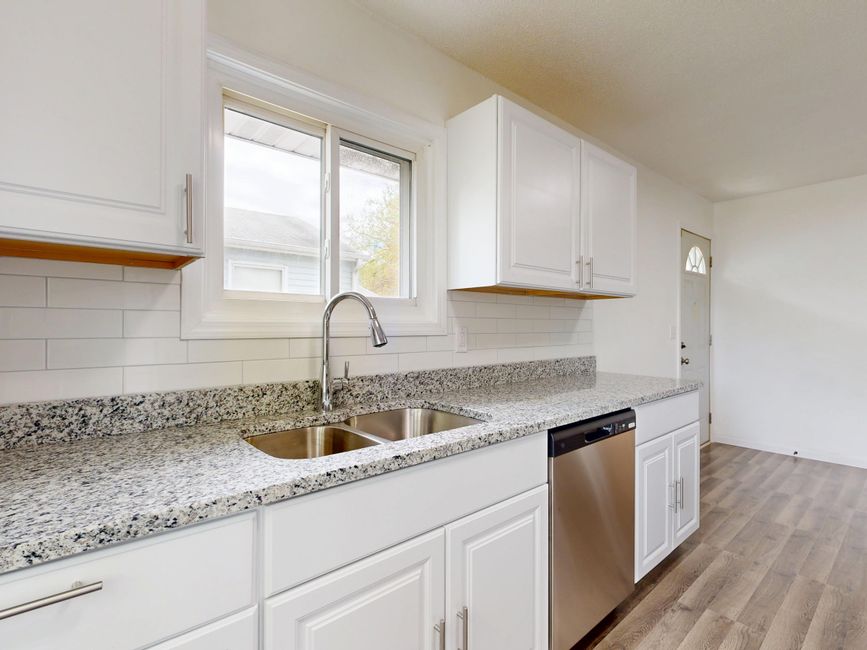
A kitchen countertop beside a sink and cabinets

Looking after quartz and granite in Temecula's dry heat and hard water

2026-10-06

What this climate does to a countertop

Temecula kitchens deal with two things that coastal kitchens mostly do not: very hard water and a long, dry, sunny season. Water drawn from wells and imported supply in Riverside County carries a lot of dissolved minerals, and when a drop evaporates on a countertop it leaves those minerals behind as a white ring or haze. Long summers add strong light through patio doors and west facing glass, so the surface beside the window spends hours warm every day.

Neither of these is a reason to avoid stone. They are reasons to build a few small habits, and to know which of the products under the sink do harm. The advice below applies to a quartz countertop and a granite one, with the differences marked where they matter.

The basic difference between the two surfaces

Granite is cut from a quarry and polished. It is porous to some degree, which is why it is sealed. Quartz is manufactured from crushed stone and resin pressed into a slab, which makes it non porous and keeps it from absorbing stains, but also makes the resin the weak point for heat and for strong solvents. Quartzite is a natural stone that behaves more like granite, and porcelain slab is a fired product with its own rules.

SurfaceSealer neededHeat toleranceMain weak point
QuartzNoModerate, resin softens under a very hot panHeat and harsh solvents
GraniteYes, now and thenHighOil and wine stains if unsealed
QuartziteYes, now and thenHighEtching on some types from acids
MarbleYes, regularlyHighEtching from lemon, vinegar, wine
Porcelain slabNoVery highChipping at edges

Daily cleaning

For most days, warm water, a drop of mild dish soap and a soft cloth are enough. Rinse the soap off afterward, since a soapy film will dull a polished surface and hold dust. Dry the area around the sink with a towel, particularly in a house with hard water. Wiping dry stops the minerals from settling, and a surface that is dried each evening almost never gets a ring.

Spills of oil, coffee, wine or juice should be wiped up when they happen. On quartz this is a matter of tidiness. On granite or marble that has lost its sealer, a spill that sits for hours can leave a dark patch. A paste of baking soda and water laid over the mark and left under plastic wrap overnight often draws it out.

Hard water rings and film

A white ring around a faucet base or a cloudy patch beside the sink is mineral scale. On quartz and granite, a cloth dampened with white vinegar and water, used briefly and rinsed at once, dissolves most of it. Marble and some quartzite should not meet vinegar at all, since acid etches them. For those, a cleaner made for natural stone is the safer answer.

A squeegee next to the sink looks fussy and works. A quick pull across the wet surface after washing up moves the water into the basin before it can dry in place. People who do this for a week usually keep doing it.

Sun and heat

Granite takes sun without any change. Quartz needs a bit more thought. A slab beside a south or west facing slider can be warm to the touch by mid afternoon in summer, and a pan set on it straight from the burner can leave a pale or glossy mark where the resin has softened. Trivets and a heat pad solve this at no cost.

Direct light over many years can also shift the colour of some quartz slightly, especially lighter and cream tones. Blinds or a window film on the sunniest pane keep the slab and the cabinets beneath it cooler. A shop can show a small sample that has been sitting in a window, which tells a homeowner more than a brochure.

Sealing granite and other natural stone

A simple test tells whether it is time to seal. Put a few drops of water on the surface and wait fifteen minutes. If the stone darkens, it is absorbing, and the sealer has worn. If the water beads up, the sealer is working. A lighter granite may need it every year or two, while a dense dark one can go much longer.

Application is straightforward. Clean and dry the surface, wipe the sealer on in thin coats with a lint free cloth, let it soak for the time on the label, and buff off the excess so nothing dries as a film. Keep traffic off the stone until it has cured. The fabrication shop will often say what product it used and how long to leave it.

Products to keep away from the stone

  • Bleach and strong oven cleaners, which can dull or discolour the surface, and soften resin in quartz.
  • Abrasive powders and scouring pads, which scratch a polished finish.
  • Acidic cleaners on marble and some quartzite, which etch the surface.
  • Paint strippers and nail polish remover, which attack the resin in quartz.
  • Wax or polish sprays that leave a film and show every fingerprint.

Chips, cracks and seams

A chip along an edge can be repaired by a stone technician using a colour matched filler. A hairline crack that starts near a sink cutout or cooktop corner is more serious, since the stone is thin there, and it should be looked at before it runs. Seams that open slightly or collect grime can be cleaned with a soft brush, and a seam that has lifted needs the installer back rather than glue from a hardware store.

The caulk line at the wall and around the faucet is also worth a look once a year. Old silicone yellows and cracks. Replacing it takes minutes, and it keeps water from getting behind the slab and into the cabinet.

Common questions

Can a hot pot go straight on granite?

Granite tolerates heat very well, but sudden changes can stress any stone, so a trivet is still the safer habit.

Does quartz stain?

Not easily, since it does not absorb liquids. Strong dyes left for a long time can still leave a mark on a pale slab, so wipe them up.

How often should granite be sealed?

Test it with water rather than following a calendar. The result tells you whether it is time.

Is a glass cleaner safe?

Mild ones are fine for a quick wipe, though ammonia heavy formulas can dull some finishes, so a soap and water cloth is the better default.

What about the cooktop edge and the sink corner?

Those are the spots where heat, water and thin stone meet, and they deserve a glance whenever the counter is wiped.

Wipe it dry, use a trivet and test the seal on natural stone, and a countertop in Temecula will look the same in ten years as the day it went in.

Read more →

A kitchen countertop beside a sink and cabinets

What happens on countertop install day in a Temecula kitchen

2026-10-06

Why install day feels fast after a long wait

The slab has been waiting on a fabrication shop floor for a week or two, the template has been checked and rechecked, and then the whole job happens between breakfast and mid afternoon. For most kitchens in Temecula the physical work is only a few hours. That speed is possible because every hard decision was made earlier, at the template visit, and the crew arrives to execute a plan rather than invent one. Knowing the order of the day helps a homeowner stay out of the way and notice the moments that matter.

A typical crew is two or three people. One leads, one handles the heavy carrying, and a third sometimes joins for a large island. They arrive with the cut pieces numbered on their backs, a set of clamps, a vacuum, shims, adhesive tubes matched to the stone colour, silicone, a level, and a small bench grinder or hand polisher for touch ups. The truck itself matters too. Slabs travel on edge on an A-frame rack, and a driveway with a steep slope or a narrow gate changes how they unload.

Before anything is carried inside

The first twenty minutes are spent walking the room. The lead looks at the cabinets, confirms they match the template, and checks that the sink, faucet and cooktop are where the drawings said. If a cabinet has shifted or someone has swapped a range, this is when it comes out. A change at this point is annoying but fixable. A change after the first piece is down can mean taking it back to the shop.

Floors are covered with cardboard or drop cloths, and any rugs in the path are rolled up. Doorways are measured one more time, because a long island piece can need a door taken off its hinges, and in older homes the hallway turns are where a slab gets stuck. Pets and small children belong in another part of the house. A slab on edge weighs more than most people expect, and two adults move it slowly.

Removing the old surface

If the old countertop is still in place, it comes out first. Laminate peels away with a pry bar and leaves a layer of glue and chipped particleboard. Tile comes off in chunks and dust. Granite or stone that is being replaced is cut or broken at the seams and carried out in pieces. Plumbing is shut off at the valves under the sink, and the faucet and disposal are disconnected. This is the stage where an old valve that will not turn can stop the day, which is why homes with original plumbing are better served by replacing valves ahead of time.

Once the surface is off, the crew scrapes the cabinet tops clean and checks for level once more with a long straightedge. Low spots get shims. High spots get planed or sanded. A countertop is only as flat as what it sits on, and a quarter inch dip across a long run will show up later as a seam that rocks or a gap along the wall.

Setting the first piece

The longest piece usually goes in first, since it anchors the layout. Two people carry it into the kitchen on edge, tilt it flat, and lower it onto the cabinets with a dry fit before any adhesive is used. The lead checks the overhang against the template line, slides it back if needed, and confirms the back edge sits tight to the wall or leaves the planned scribe gap.

Silicone or construction adhesive in small dabs holds the stone to the cabinet frame. The stone does not need to be glued down fully. Gravity, the weight of the slab, and a few anchor points do most of the work, and a surface that is not locked down hard has room to move slightly with temperature. In a climate where kitchens swing between a cool morning and a hot afternoon, that small allowance matters.

The seam

A seam is where the day slows down. The two pieces are dry fitted, and the installer checks that the top surfaces sit at exactly the same height. Then the edges are cleaned with solvent, adhesive is applied along the joint, and the pieces are pulled together with suction cups or small clamps that draw them tight. A good installer works on the line until the surfaces are level, scrapes off the excess before it cures, and polishes the last trace away.

The adhesive is colour matched to the slab. On a plain quartz in a pale colour the joint nearly disappears. On a veined pattern the installer pays more attention to whether the veins line up, and a seam that falls across a strong vein needs more patience than one in a quiet area. Heat from a bright west window can speed the cure, so a seam near strong afternoon light is often worked earlier in the day.

The sink cutout and holes

If the sink is an undermount, the cutout was made at the shop, and the installer now fits the bowl from underneath. The sink is lifted up against the underside of the stone, clipped or braced in place, and sealed with a bead of silicone. The reveal, the small step between the stone edge and the bowl rim, is checked from above. A uniform reveal around the whole bowl means the cutout and the sink agree.

Faucet holes are already drilled in most jobs. A cooktop cutout is dropped over the unit to confirm clearance. If anything does not match, small adjustments can sometimes be made on site with a hand grinder, but a large error is not something to fix in a customer's kitchen, and the piece goes back to the shop.

Overhangs, brackets and the island

An island with a seating overhang is checked for support. Quartz and granite are strong in compression but weak when a long unsupported span carries weight, and a person leaning on a bar edge can crack a slab that has nothing underneath. Corbels, steel brackets or a cabinet extension carry the load. The installer presses down along the overhang before packing up. It should feel solid, with no flex and no creak.

Backsplash gap, caulk and cleanup

Once the tops are set, a thin bead of silicone goes along the back edge where the stone meets the wall or tile. This gap is deliberate. Walls move slightly, and the bead lets the stone and the wall shift without cracking either. The bead is smoothed with a damp finger or tool, and the colour is matched to the slab or the wall.

Cleanup is the last visible step. Dust from any cutting on site is vacuumed, adhesive haze is removed from the surface, and the stone is wiped with a cleaner that suits the material. Granite may be sealed on the spot or at the shop, and the installer should say which. Quartz needs no sealer.

What to do while the crew works

  • Keep the path from the driveway to the kitchen clear of boxes and furniture.
  • Empty the cabinet under the sink and any drawers near the range.
  • Be reachable for decisions about seam position or a faucet hole that does not line up.
  • Do not lean on a fresh seam or set heavy items on the surface until the adhesive has cured.
  • Walk the finished tops with the lead and point out anything that looks wrong, with the crew still on site.

Common questions about the day

How long does installation take?

A typical kitchen with one or two seams takes a half day to a full day. A large island, a waterfall edge or an L-shaped run with multiple pieces can run longer.

Can the sink and faucet be reconnected the same day?

Often yes, though many installers wait for the adhesive and silicone to set before the plumber hooks up the disposal and dishwasher. Ask which will be done and which will need a second visit.

Is a small chip at an edge normal?

A tiny flaw can happen when a heavy slab is handled, and a good crew repairs it on the spot with colour matched filler. A large chip is a different matter and means the piece should be replaced.

Do the seams cure fast?

The surface is usually safe for light use within a day, though full strength takes longer. Hot pans and heavy weights should wait.

Install day is short because the planning was long, and a clean finish comes from level cabinets, an accurate template and a seam that was worked slowly.

Read more →